As an Amazon Associate, we earn from qualifying purchases. Some links on this site are affiliate links at no extra cost to you. Our recommendations are based on thorough research and editorial judgment.

How To Install Landing Gear
To install landing gear, begin with thorough preparation. Gather all necessary tools and inspect components for wear or damage. In the assembly process, securely fasten the landing gear and wheels, using proper torque specifications. Conduct hydraulic and mechanical checks, ensuring fluid cleanliness and smooth gear operation. Adjust alignment as per manufacturer specs for precise positioning. Finally, perform rigorous post-installation tests to verify responsiveness. Continue exploring for more detailed steps and expert tips on achieving ideal landing gear installation.
Key Takeaways
- Prepare a stable workspace, ensuring all tools are checked and safety protocols are followed before starting the installation process.
- Inspect landing gear components for wear and functionality; clean and verify sizes against specifications to prevent future issues.
- Insert the landing gear fully into designated sockets and secure clamps by finger-tightening, followed by one and a quarter turns.
- Check hydraulic systems, ensuring fluid is clean and connections are free of leaks; conduct operational tests for smooth gear movement.
- After installation, perform thorough testing of the gear’s extension, retraction, and braking responsiveness under various load conditions.
Preparation and Parts Identification
You may be interested


3 Best RC Landing Gear That Will Elevate Your Drone Experience
November 19, 2025

How does one become truly prepared for the installation of landing gear? Preparation begins with a complete tools checklist, making certain all necessary equipment is on hand. This includes drill bits, AN-type bolts, torque wrenches, and clamps. Safety protocols are paramount; inspecting landing gear legs for cracks and cleaning components to prevent issues is vital.
Key steps in preparation involve:
- Inspection: Examine all parts for wear, making certain functionality.
- Cleaning: Remove grease and debris from important areas.
- Identification: Verify sizes and confirm components match specifications.
Establishing a workspace for stability is essential, allowing for careful assembly. Following these steps can foster a sense of belonging, as thorough preparation cultivates confidence and readiness for the vital installation task ahead. Additionally, ensuring compliance with safety standards can further enhance the overall security of the installation process.
Recommended Products

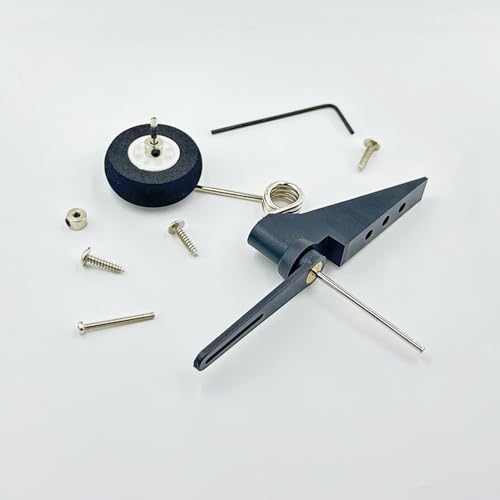
【Advantage】The tires is equiped with sealed air valve, which has good sealing performance and can be inflated and deflated independently according to the needs.


1. Size: Outer DIA: 0.31", Inner DIA: 0.12", Height: 0.16".
Assembly Process
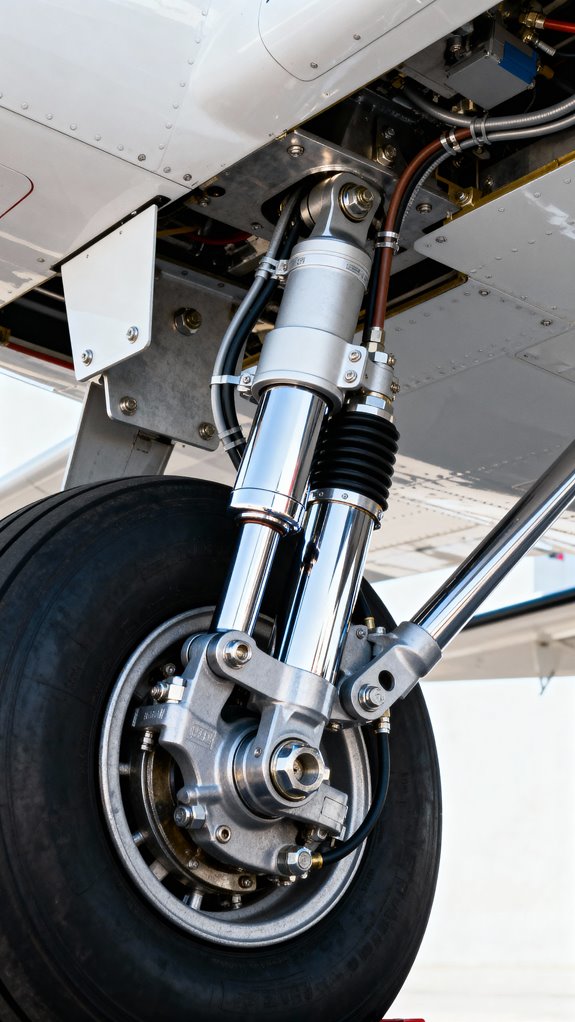
Once all parts have been carefully inspected and prepared, the assembly process can begin. First, insert the landing gear into the designated sockets at the aircraft’s bottom, ensuring full engagement. Use appropriate installation techniques by initially finger-tightening clamps to avoid damage. Secure them, allowing for one and a quarter turns until the screws thread through the retention collars.
Next, prepare the wheels by cleaning the hubs and repacking the bearings for optimum component compatibility. Use a rubber mallet to ease the wheel onto the axle if necessary, followed by securing with a large nut and cotter pin. Finally, assemble the central steel pillar, axle, and wheels, ensuring precise fitting for a reliable installation that meets safety standards. Additionally, ensure that safety features are thoroughly checked to prevent hazards during use.
Recommended Products


Hydraulic and Mechanical System Checks

Recommended Products

Superior quality, universal hydraulic fluid designed to mix with all hydraulic fluids in power trim and steering systems

Multi-Purpose Fluid: Recommended for hydraulic, final drive, transmission, differential, and wet brake systems in Kubota equipment

Container Type: Bottle - Easy-to-handle and store 1 quart of SeaStar's hydraulic steering fluid in this bottle
Hydraulic and Mechanical System Checks
Hydraulic and mechanical system checks are essential for ensuring the safe and reliable operation of landing gear. Regular inspection of hydraulic fluid is vital; it should be clean, clear, and free from contamination. Cloudy or burnt-smelling fluid indicates overheating or contamination, demanding immediate attention.
Leak Detection
Inspect all hydraulic lines, connections, and actuators for signs of wear or leaks, particularly at fittings and seals. Any detected leaks must be addressed promptly to avoid system failure.
Operational Tests
Conduct operational tests by cycling the landing gear while ensuring smooth movement without unusual noises. Additionally, verify the engagement of mechanical locks and the function of warning systems to alert pilots of gear position. Maintaining proper hydraulic fluid levels and system integrity is key to safe landings. Ensuring that hydraulic fluid levels are regularly monitored can prevent potential system failures.
Alignment and Adjustment

Proper alignment and adjustment of landing gear play a significant role in guaranteeing aircraft stability and safety during operation.
Recommended Products

Adjustable and Precision: Mounted on the wheel or brake-disc surface, this adjustable alignment tool features a back-placed responsive knob offering ‑5° to 5° adjustment, accurately restoring the tilt angle after tire or suspension repairs to keep tires in top condition

Compatibility: This product is only compatible with DJI Avata 2

Main Characteristics: Our wheel alignment tool is capable of assisting you in resetting the strut to its initial camber position after the suspension has been removed and reinstalled. It can also check the extent of camber variation prior to re-installation. This camber alignment tool is ideal for precisely inspecting the castor and camber angles
Leveling and Reference Setup
- Lock gear legs using shim or wedge assemblies for accurate positioning.
- Use a water level, avoiding uneven hangar floors for references; verify tire pressures are equal.
Toe Adjustments
- Adjust toe-in or toe-out according to manufacturer specifications.
- Employ lubricated aluminum plates under wheels for precise measurements; employ a straight edge for checking alignment.
Camber Alignment
- Measure camber tilt from a vertical perspective to adjust using specific shims as indicated.
- Check camber at typical operational weight to maintain accuracy, verifying proper wear and minimizing strain on suspension components. Additionally, maintaining proper tire pressure can significantly enhance landing gear performance and overall aircraft safety.
Through these adjustments, accurate landing performance and tire longevity are promoted.
Post-Installation Testing

Post-installation testing is a critical step in confirming the reliability and safety of landing gear systems. This phase encompasses several essential components:
- Functional Verification: Smooth extension and retraction of hydraulic actuators must be confirmed, guaranteeing there are no fluid leaks during pressurized operation.
- Braking System Checks: The brake system should be responsive, with inspections for wear and proper adjustment, coupled with performance tests under various load scenarios.
- Mechanical Verification: Inspect the landing gear structure for damage and ascertain actuating mechanisms function without abnormal noises.
- Timing and Operational Characteristics: Measure full cycles to verify they meet standard figures, logging parameters for future reference.
- Environmental Testing: Conduct stress tests to evaluate gear performance under varying conditions, adhering to strict safety protocols. Additionally, ensure that proper care is taken to maintain components for optimal performance over time.
Recommended Products

CUSTOM DEEP DROP RIG FOR SALTWATER FISHING: Designed for grouper, halibut, blackfish, and porgy, this rig features five circle hooks on a strong leader, keeping multiple baits in the water to increase your chances of landing bottom-dwelling fish.
Frabill | Trusted By Anglers Since 1938

【Multi-Functional Storage Rack】Featuring movable hooks, side bat rack and 3 tiers storage shelf, this garage storage rack provides specialized storage for accessories such as helmets, gloves, basketballs and more items, keeping them readily available whenever needed.
Frequently Asked Questions
What Are the Common Signs of Landing Gear Wear?
Common signs of landing gear wear include structural cracks, hydraulic fluid leaks, and abnormal noises. Regular maintenance routines can help guarantee ideal landing performance, enhancing safety and reliability for aircraft operators and their passengers alike.
How Often Should Landing Gear Be Inspected?
Landing gear demands regular companionship through diligent inspections; typically every 50 hours or annually, guided by a maintenance schedule that reflects both regulatory rhythms and the aircraft’s unique story—ensuring safety and dependability in the skies.
Can I Install Landing Gear Without Professional Help?
Installing landing gear without professional help is risky; DIY installation demands extensive safety precautions, technical skills, and specialized tools. Inexperience can lead to serious mechanical failures, emphasizing the importance of qualified assistance for aircraft safety and performance.
What Should I Do if the Gear Won’t Retract?
Facing gear retraction issues, one must perform gear malfunction troubleshooting while prioritizing hydraulic system inspection. Understanding these intricacies fosters connection among those maneuvering similar dilemmas, emphasizing shared experiences and the importance of cooperation in aviation safety.
Are There Any Specific Tools Required for Landing Gear Installation?
Specific tools essential for landing gear installation include wrenches, torque wrenches, and rivet guns. Effective installation techniques incorporate these tools, enabling precision and safety, fostering confidence and camaraderie among those involved in the intricate process.