As an Amazon Associate, we earn from qualifying purchases. Some links on this site are affiliate links at no extra cost to you. Our recommendations are based on thorough research and editorial judgment.

How To Build An RC Plane From A Kit
Building an RC plane from a kit requires careful steps. First, choose the right kit based on your skill level and preferences, such as RTF or ARF options. Assemble the fuselage using a central keel for alignment and reinforce with plywood doublers. Construct the wings, secure servos, and integrate electronics like the brushless motor and ESC. Finally, install the landing gear and conduct pre-flight checks to verify everything operates smoothly. Discover more helpful tips to enhance your building experience.
Key Takeaways
- Choose the right kit type (Raw, BNF, ARF, RTF) based on your experience level and desired assembly complexity.
- Assemble the fuselage using a central keel for alignment and glue plywood doublers for added strength.
- Construct wings using accurate rib placement and secure servos with pre-cut trays to ensure proper function.
- Integrate electronics by connecting the brushless motor to the ESC, ensuring clear orientations and reliable solder joints.
- Install landing gear carefully, using proper bolt patterns and ensuring all components are secured for successful flight.
Kit Selection and Preparation
You may be interested


When commencing on the journey of building an RC plane, selecting the right kit is essential for both enjoyment and success. Understanding various kit types prepares enthusiasts for their ideal project.
- Kit Types:
- Kit: Raw parts requiring complete assembly, perfect for experienced builders.
- Bind-N-Fly (BNF): Includes power systems but excludes transmitters, catering to intermediates.
- Almost Ready-to-Fly (ARF): Partially assembled, needing motor and radio, suited for those with moderate skill.
- Ready-to-Fly (RTF): Fully assembled for beginners enthusiastic to fly quickly.
Power systems also play a critical role. Selecting the right motor—whether brushed or brushless—ensures compatibility with the plane’s weight and enhances performance. These choices considerably influence the flying experience, highlighting the excitement of dedicated hobbyists. Additionally, considering eco-friendly formulations can contribute to a healthier environment for flying.
Recommended Products

Fully painted white with orange Navy RC-45J (SNB-5P) navigation and photo reconnaissance trainer trim scheme
Incredible Short Takeoff and Landing (STOL) plus 3D capabilities

EASY TO FLY RC AIRPLANE: Equipped with exclusive SAFE technology that helps prevent crashes and makes it easy to learn how to fly.
Fuselage Assembly
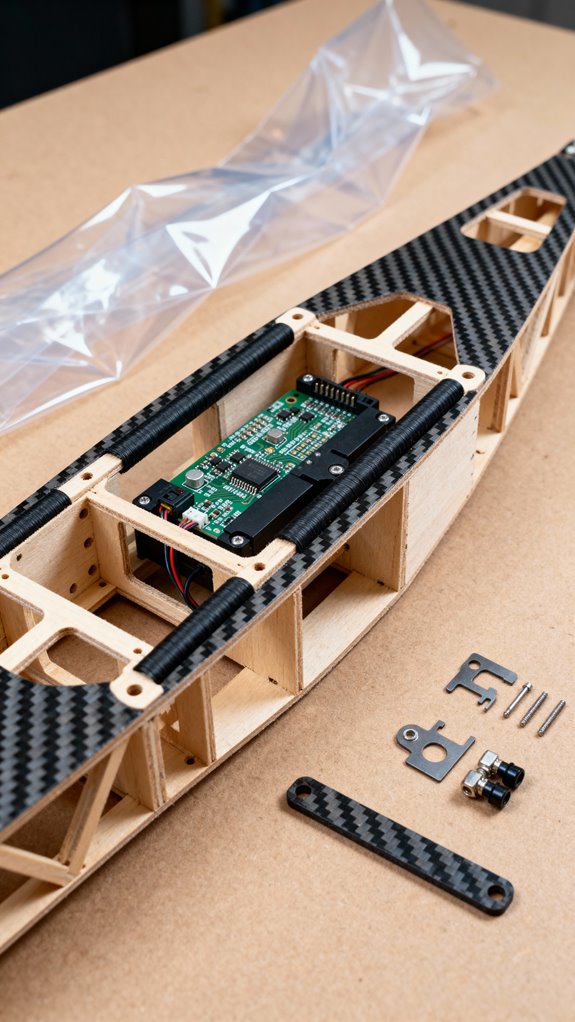
With the kit selected and preparations underway, the assembly of the fuselage marks a significant step in bringing the RC plane to life. This stage centers on creating a solid fuselage design, essential for overall structural integrity.
- Begin by laying out all pieces from laser-cut sheets, streamlining the assembly process.
- Utilize a central keel for alignment and straightness, enhancing the fuselage’s strength.
- Building jigs help maintain straight panels during gluing, ensuring a tidy final assembly.
- Laminate the firewall for durability and attach the motor securely, preventing vibrations from loosening connections.
Next, glue plywood doublers for added rigidity. Finally, assemble the fuselage halves carefully, balancing it to achieve the proper center of gravity, paving the way for thrilling flights ahead. Additionally, ensure that you consider battery type to avoid potential power issues during operation.
Recommended Products

Bell UH-1N Huey glass fiber scale fuselage in premium quality and finish.

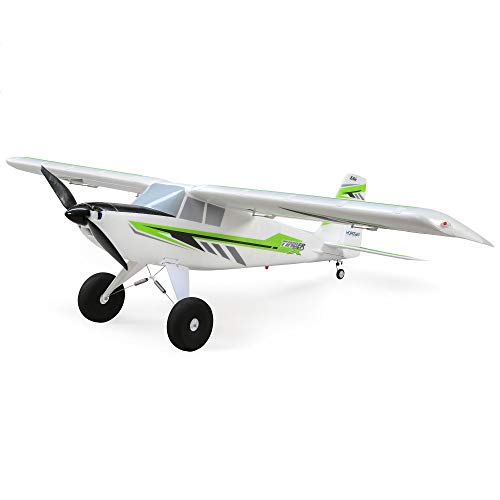
The most capable, versatile and easiest to fly scale trainer based on the iconic Carbon Cub from CubCrafters

An officially-licensed* replica of the world’s fastest and highest-flying manned aircraft that offers a flying experience unlike any other model
Wing Construction and Servo Installation

Achieving robust wing construction paired with precise servo installation is essential for an RC plane’s performance and maneuverability.
Wing Construction
Start by using a full-size wing plan for accurate wing rib placement. Securely install the spar, aligning ribs squarely while temporarily pinning them to maintain alignment. Confirm the main wing spar is attached to the bottom sheeting for structural integrity, adding shear webs for increased stiffness.
Servo Installation
Select servo locations that allow easy adjustments. Pre-cut servo trays are ideal for securing servos without compromising the wing’s shape. When running the pushrods, keep the path clean to minimize friction. Reinforce servo areas with small hardwood blocks to prevent damage during flight. Additionally, incorporating ergonomic design in your build can enhance overall stability during flight.
With these steps, builders can craft a strong, responsive wing setup, enhancing their flying experience.
Recommended Products

STRONG DURABILITY and LONG SERVICE LIFE:It is made of EPP foam, ABS, carbon fiber. This excellent material helps to improve impact resistance and is not easy to break.

Easy control: LEAMBE Airplane has a simple operation mode which only needs to press the switch and pull the stick to easily control the aerobatics of the aircraft. It can take off after you assemble the wheels, and it is also convenient to carry. Best outdoor games and toys for you

The appearance of the plane is like a vivid eagle, very cool and beautiful.
Electronics Integration
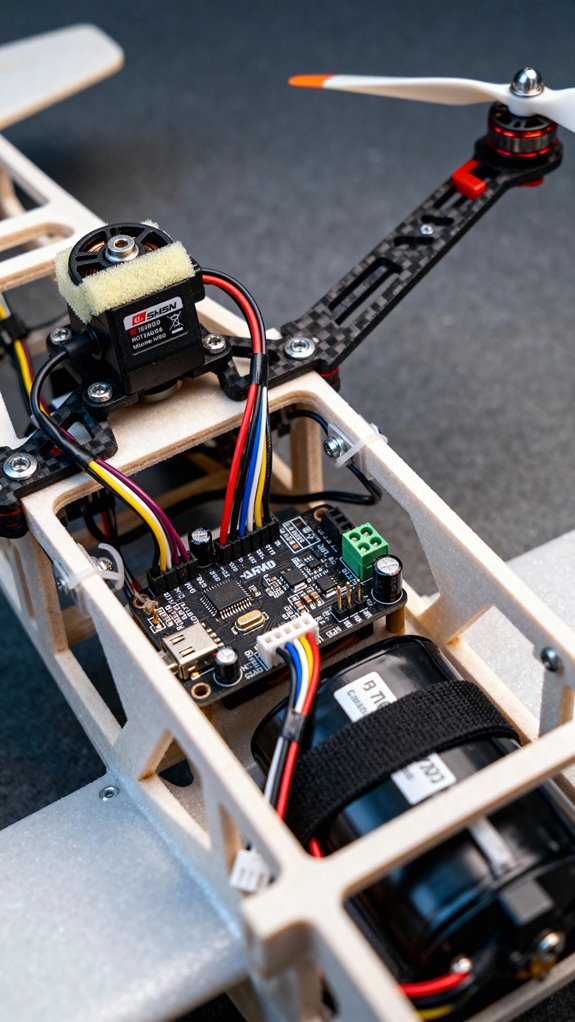
Integrating electronics into an RC plane is an essential step that greatly influences its performance. Proper motor control starts by securely connecting the brushless motor to the ESC, guaranteeing reliable solder joints, and using heat shrink tubing for insulation. Afterward, the ESC’s control lead connects to the receiver’s throttle input, typically channel 3.
Receiver binding involves plugging in a bind plug and powering the system while pressing the bind button on the transmitter. Once bound, confirm with the receiver’s solid LED light.
Additionally, verify all connections, such as servos and auxiliary components, face the same orientation for clarity. Safety remains paramount; use a power switch and perform pre-flight checks to confirm functionality, making every flight a thrilling experience. Incorporating safety features like automatic shut-off timers can enhance the overall reliability of your RC plane system.
Recommended Products

Ultra-Realistic Alloy Design: 3-blade flybarless RC helicopter with openable cockpit, detailed dashboard and metal sandblasted finish, creating a true-scale, premium realistic RC helicopter model

Ultimate 380‑Class Performance: Direct-drive brushless motor + belt‑driven tail combined with carbon fiber blades deliver exceptional power, torque, and precision in aggressive maneuvering.

The ultimate 1/8 scale ARRMA buggy out of the box, with many laser-etched TLR Tuned parts.
Landing Gear Installation
Landing gear installation serves as a vital aspect of building a robust and functional RC plane. Proper landing gear alignment guarantees effective performance and stability, making it essential for flight success.
Preparing and Aligning Landing Gear Mounts
- Match bolt patterns and part shapes before mounting.
- Use M4 metric bolts, securing with washers for smoother installation.
Securing Components
- Apply red Loctite adhesive to bolts for lasting security.
- Use wheel collars accurately marked for secure wheel placement.
Adjusting Nose Gear Installation
– Modify the nose gear length and ascertain a snug fit of the nose cone.
Installing Retractable Gear
– Mount retract units perpendicular to the centerline, ensuring correct retraction geometry.
These steps collectively enhance gear stability, contributing to an overall successful build process. Additionally, ensuring safety features such as secure mounting can greatly improve the reliability of your RC plane during takeoff and landing.
Recommended Products

GRADE 8.8 ALLOY STEEL MATERIAL: This bolt assortment is made of heavy duty Grade 8.8 Alloy Steel, corrosion resistance, good wear resistance, high hardness.

1724Pcs Larger Quantity Various M2 M3 M4 M5 Screws with Nuts and Flat Washers: Nice set screw assortment kit: 110 M2 Screws, 110 Nuts; 110 M3 Screws, 110 Nuts; 110 M4 Screws, 110 M4 Nuts; 75 M5 Screws, 75 Nuts; 440 Flat washers and 470 lock washers

Larger Quantity: 1160Pcs, Various M3 M4 M5 M6 Metric Bolt Assortment with Lock Washers to Meet More Demands: Nice set screw assortment kit: M3: Total 85 M3 screws; 85 M3 Nuts; 90 M3 Washers; 90 M3 Lock Washers. M4: Total 80 M4 screws; 80 M4 Nuts; 85 M4 Washers; 85 M4 Lock Washers. M5: 65 M5 screws; 65 M5 Nuts; 70 M5 Washers; 70 M5 Lock Washers. M6: 50 M6 screws; 50 M6 Nuts; 55 M6 Washers; 55 M6 Lock Washers. 4 hex keys, 1 x tweezer, 1 x transparent screws and nuts organizer
Final Assembly and Pre-Flight Checks
The final assembly and pre-flight checks represent critical stages in the construction and preparation of an RC plane. These steps guarantee everything is in place for a successful flight.
Final Adjustments:
- Secure electronics, including the ESC and BEC, using zip ties or Velcro strips.
- Confirm control surfaces move freely by checking hinges and adjusting linkage.
Safety Checks:
- Perform a range check to confirm radio signal strength.
- Verify the motor’s spin direction; reverse connections if necessary.
- Conduct complete control surface tests for responsiveness, adjusting trims as needed.
Incorporating safety features, such as auto-shutoff functionality, can enhance the reliability of your RC plane during testing. Finalizing these steps builds confidence and fosters a sense of community among RC enthusiasts, bringing everyone one step closer to experiencing the thrill of flight.
Frequently Asked Questions
What Is the Ideal Environment for Flying an RC Plane?
The ideal environment for flying an RC plane resembles a serene canvas of blue skies, with favorable weather conditions featuring light winds and ample visibility. Open, obstacle-free locations guarantee a sense of belonging in the flying community.
How Do I Troubleshoot Common Flight Performance Issues?
To troubleshoot common flight performance issues, one must inspect control surfaces for movement and guarantee proper adjustments for flight stability. Evaluating connections and linkages aids in enhancing overall control, fostering a sense of confidence within the flying community.
What Safety Precautions Should I Take While Flying?
What could be more essential than an extensive pre-flight checklist and understanding flight area restrictions? Safety precautions include thorough inspections, avoiding crowded locations, and adhering to guidelines ensuring a communal, enjoyable flying experience for all.
How Often Should I Maintain My RC Plane?
To maintain an RC plane effectively, a regular maintenance schedule should be established, including preflight checks and detailed inspections every 25 to 100 flight hours. Following maintenance tips guarantees longevity and enhances flying enjoyment within the community.
Can I Customize My RC Plane After Building It?
Yes, RC planes can be customized after building. Enthusiasts often explore design modifications, such as unique paint schemes and upgraded components, allowing individual expression and enhancing performance, fostering a sense of belonging within the hobbyist community.