As an Amazon Associate, we earn from qualifying purchases. Some links on this site are affiliate links at no extra cost to you. Our recommendations are based on thorough research and editorial judgment.

How To Flash Firmware On Your Flight Controller And ESCs
Flashing firmware on flight controllers and ESCs involves a few key steps. First, verify compatibility with the ESC’s hardware and select the right firmware, like Betaflight or BLHeli. Use dedicated software to connect your flight controller via a stable USB cable, avoiding hubs. A full chip erase helps, followed by loading the firmware. Post-flash, fine-tune settings and check ESC functionality. Monitoring for telemetry loss and performing test flights are vital for ideal performance. Discover essential tips for a smoother experience ahead.
Key Takeaways
- Ensure compatibility of firmware with your flight controller and ESC hardware before proceeding with flashing.
- Use dedicated software like Betaflight Configurator and BLHeliSuite to manage firmware installations efficiently.
- Power the ESC with the flight battery and connect to the flight controller for smooth passthrough programming during flashing.
- After flashing, adjust settings manually to enhance performance and verify current firmware versions for successful updates.
- Conduct test flights in controlled environments to monitor functionality and identify any potential issues post-flashing.
Understanding Firmware Flashing Basics
You may be interested


When delving into the world of firmware flashing, understanding the fundamentals is essential for both newcomers and seasoned hobbyists. Firmware types vary for flight controllers and Electronic Speed Controllers (ESCs), markedly impacting performance. Flashing techniques involve using dedicated software, such as Betaflight Configurator for flight controllers or BLHeliSuite for ESCs, where compatibility is key to prevent equipment malfunction.
Critical steps include selecting the correct firmware version, ensuring settings are configured post-flash, and recalibrating devices. Each firmware update enhances performance, introduces crucial features, and resolves bugs. Remember to save your settings as “diff” files for easier restoration, and always verify configurations before your first flight. Embracing these basics fosters a stronger connection within the hobbyist community. Additionally, back massagers can be beneficial for alleviating tension that may arise from long hours of flying or working on your drone setup.
Preparing for Flight Controller Firmware Flashing

Preparing for flight controller firmware flashing is essential for guaranteeing that devices operate at their best. To achieve a smooth flashing process, a thorough pre-flashing checklist must be followed, including:
- Identify Boot Options: Locate the boot button or solder pads near the USB port.
- Check USB Connection: Use reliable USB ports; avoid hubs to prevent failures.
Utilizing appropriate flashing tools, such as Betaflight Configurator, guarantees compatibility with your flight controller. Disable unnecessary expert features to minimize errors. Remember to perform a “Full Chip Erase” for a clean start.
Before you begin, guarantee all motors and peripherals are disconnected, and consider documenting key settings, such as PID tuning and VTX tables, for easy reconfiguration post-flash. Additionally, ensure that you are using UV-free light options to maintain optimal eye safety during the process. Happy flashing!
Selecting the Right Firmware Version

Selecting the right firmware version can greatly influence the performance of a flight controller and its accompanying electronic speed controllers (ESCs). Conducting compatibility checks is essential. Firmware must match the ESC’s hardware chipset, ensuring peak performance. For instance, selecting updated firmware like Bluejay enhances functionality and supports modern communication protocols like DShot.
Benefits of choosing the latest stable firmware include access to performance optimization and bug fixes. Community support is crucial, as active development offers ongoing firmware updates and customization options. Additionally, utilizing latest stable firmware can lead to improved efficiency and reliability in your flight system.
Recommended Products

🏆4 MISSION READY PAYLOAD - Autel EVO Max 4T V2 payload integrates ➊Wide-Angle Camera(48MP, 1/2" CMOS, f/2.8 Aperture, 83.4° DFVO, 24 mm Equivalent), ➋Zoom Camera(48MP, 8K 10x Optical Zoom, 160x Max. Hybrid Zoom, f/2.8-f/4.8 Aperture), ➌Thermal Camera(640x512 resolution, 9.1mm Aperture, 16x Digital Zoom, Temperature Measurement, -4 °F to 1022 °F range) and a ➍L-aser Rangefinder(5 - 1200m Measuring Range, ±1m accuracy) for all data capture needs and critical decision making. 📣For ass.istance with packaging, accessories, usage, firmware updates, or any other issues, please rea.ch our te.ch su.pport team at 💌autelofficial @ outlook . com💌

👍【AUTEL ROBOTICS USA AUTHORIZED】We are the longest and largest distributors of Autel Robotics. Over the years, we have maintained a close partnership with Autel, providing customers with high-quality and excellent after-sales service. With extensive experience and strong technical expertise in the industry, we offer customized solutions and professional technical support to our customers. All the UAVs we offer include FULL USA WA-RRANTY. 📣For ass.istance with packaging, accessories, usage, firmware updates, or any other issues, please rea.ch our te.ch su.pport team at 💌autelofficial @ outlook . com💌

𝗖𝗮𝗽𝘁𝘂𝗿𝗲 𝗕𝗿𝗲𝗮𝘁𝗵𝘁𝗮𝗸𝗶𝗻𝗴, 𝗜𝗺𝗺𝗲𝗿𝘀𝗶𝘃𝗲 𝗦𝗵𝗼𝘁𝘀 - DJI Air 3's dual cameras offer creative focal-length options ideal for travel photography. Show off stunning environments and tell captivating stories through your lens.
Using Betaflight Configurator for Flashing
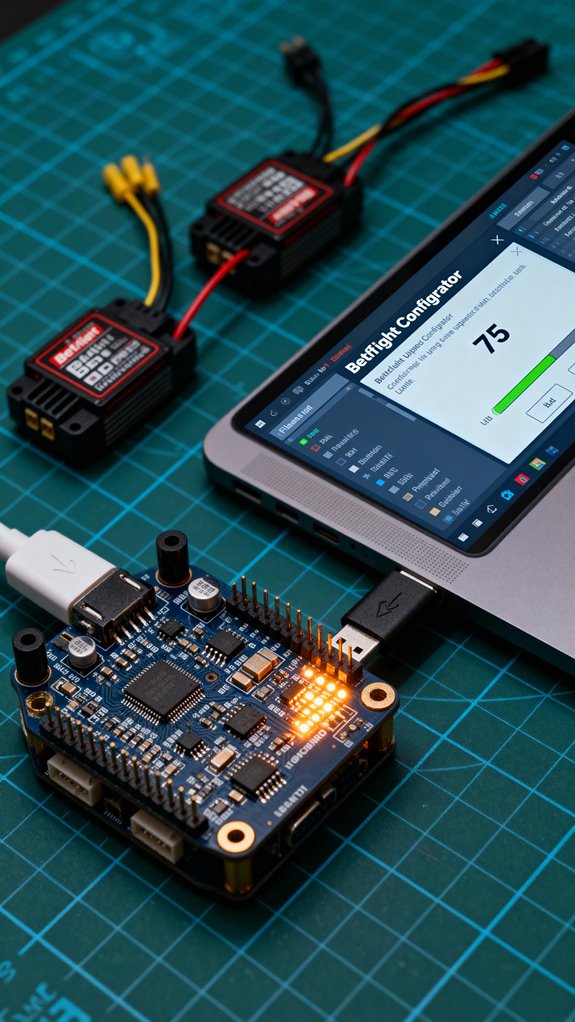
Flashing firmware on flight controllers and ESCs is a pivotal step that follows the careful selection of the appropriate firmware version. Using Betaflight Configurator simplifies this process with its intuitive interface. Safety Features are crucial to ensure that the flashing process occurs without any issues.
Flashing Procedures
- Navigate to the “Firmware Flasher” tab, connecting the flight controller to your PC via USB.
- Use the “Auto-Detect” feature to select the correct board, confirming accuracy with the CLI command `version`.
- Choose the firmware version, preferring stable releases for better firmware reliability.
Once everything is set, click “Load Firmware [Online]” or “Load Firmware [Local]”, followed by “Flash Firmware.” Remember, always keep that USB connection secure during flashing to prevent bricking your controller!
Recalibrating Your Flight Controller

Recalibrating a flight controller is an essential step to confirm peak performance and stability during flight. This process starts with IMU calibration; the controller must be still on a level surface while following prompts to orient it in various positions. Successful calibration indicates precise sensor validation.
Next, ESC calibration guarantees that the motors respond accurately to throttle input. This requires connecting the flight controller to configurator software and adjusting the throttle smoothly.
Utilizing proper calibration tools makes this procedure easier and enhances throttle responsiveness. It’s important to maintain a regular calibration frequency to confirm safe and ideal operation. Following these steps will considerably improve flight dynamics, making every flight a memorable experience. Additionally, ensuring proper TENS unit usage can help alleviate any muscle tension that may arise during long flights.
Flashing FLHeli_S ESC Firmware
With calibration procedures completed, the focus shifts to optimizing performance through firmware updates for Electronic Speed Controllers (ESCs). Flashing BLHeli_S firmware elevates an ESC’s responsiveness and functionality.
Preparation Steps:
- Connect the ESC signal wire to the flight controller for passthrough programming.
- Power the ESC using a flight battery during the flashing process for stable power.
Flash Process:
- In BLHeliSuite, select the “SILABS BLHeli Bootloader (Cleanflight).”
- Click “Read Setup” to verify current firmware.
- Choose “Flash BLHeli” and select the latest version.
Confirm successful flashing by checking the updated ESC revision number. This process enhances BLHeli_S features, ensuring a smoother flight experience, while protecting against potential ESC damage. Additionally, utilizing a 3-in-1 Neck Massager can provide relief for tension accumulated during long hours of piloting.
Using BLHeli Configurator for ESC Updates
Using BLHeli Configurator for ESC updates presents an efficient means to manage firmware across multiple Electronic Speed Controllers. This tool allows users to connect easily through the flight controller’s COM port, enabling communication after powering the ESCs.
Recommended Products

【High Power ESC】Supports 6-12S LiPo batteries,Adjustable BEC output (6V/7.4V/8.4V),current up to 25A.The ESC supports 400A continuous current and a maximum instantaneous current of 800A,Turbo timing adjustable is available from 0°to 26°

Smart all-in-one telemetry

ARRMA BLX120 Brushless 4S ESC, ARA390264
Key Steps
- Read Setup: Retrieve and review current settings.
- Flash All: Update firmware simultaneously with the latest version.
- Calibration Techniques: Adjust settings like motor timing and braking strength post-flashing.
Troubleshooting
If flash errors occur, reflashing may be necessary on individual ESCs, ensuring all devices work correctly. The intuitive interface and automated processes foster a community spirit among users seeking reliable, optimized performance for their builds. By embracing these techniques, pilot enthusiasts can enhance their flying experience efficiently.
Flashing AM32 ESC Firmware
Flashing AM32 ESC firmware allows enthusiasts to access the full potential of their speed controllers, guaranteeing maximum performance in various flight conditions. This process begins with the AM32 bootloader, replacing the BLHeli_32 bootloader to guarantee compatibility with AM32 tools.
Flashing Steps:
- Use the STM32 ST-Link Utility or dedicated programmers.
- Connect the MCU to ST-Link via the SWD interface.
- Load the appropriate AM32 bootloader hex file and flash it.
Once flashed, connect the ESCs to the flight controller and power them on. Utilize tools like Multi ESC Config Tool or AM32 Configurator. Load the AM32 firmware hex file and complete the firmware update on all ESCs. Successful flashing is confirmed with a “GOOD ACK” signal, priming the ESCs for enhanced performance.
Utilizing BLHeliSuite for ESC Flashing
BLHeliSuite serves as a powerful tool for hobbyists and professionals alike who are engaged in the flashing and configuration of ESC firmware. This Windows application offers essential BLHeliSuite features, enabling users to download the latest firmware and configure ESC settings effectively.
To get started, verify proper installation by downloading from official sources like GitHub, and unpack firmware archives accordingly. After connecting the ESCs to your flight controller, use the “Read Setup” button to access current firmware details and troubleshoot with options like “Check” if necessary.
Once ready, initiate flashing with the “Flash BLHeli” button, confirming selections through prompts. After flashing, remember to adjust crucial settings to enhance performance, solidifying the connection between technology and user experience.
ESC-Specific Flashing Methods
When diving into the world of ESC-specific flashing methods, enthusiasts can explore a variety of firmware options, each offering unique benefits and features tailored to specific needs.
SimonK Benefits: Known for its improved responsiveness, SimonK firmware reduces latency compared to stock options, making it a go-to choice.
JESC Limitations: While JESC provides advanced telemetry features, it requires paid licenses per ESC and is not suitable for new installs.
AM32 Features: Targeting 32-bit ESCs, AM32 enhances throttle response and offers advanced functionalities, though it often permanently erases previous firmware.
Bluejay Risks: Designed for specific chipsets, Bluejay improves performance but poses risks of bricking ESCs, underscoring the need for careful flashing procedures.
Flashing Tekko32 ESCs: A Step-by-Step Guide
Tekko32 ESCs offer a robust platform for enhanced drone performance, and flashing the appropriate firmware is key to accessing their full potential. Here’s a structured guide to flashing Tekko32 models using essential flashing tools.
Preparation
- Download the ESC Config Tool and the suitable firmware from am32.ca/downloads.
- Connect an SWD programmer, like ST-Link, to the ESC’s SWD, SWC, and GND pins, ensuring the ESC is powered.
Flashing the Bootloader
- Use the STM32 ST-Link Utility to flash the AM32 bootloader onto the ESC.
- Verify successful flashing with acknowledgment messages.
Flashing AM32 Firmware****
- Connect the ESC to your flight controller and open the ESC Config Tool.
- Load the AM32 firmware file and flash each ESC.
Verification
1. Check for “GOOD ACK” status and test motor functionality before assembly.
Common Pitfalls to Avoid During Flashing
Flashing firmware on flight controllers and ESCs can be a rewarding experience, yet several common pitfalls can hinder a smooth process.
Driver and Connection Issues
Flashing errors often stem from missing or incorrect drivers. Using a data-capable USB cable is vital, as charging-only cables will fail. Tools like ImpulseRC Driver Fixer help guarantee you have the right drivers.
Firmware Compatibility Errors
Installing the wrong firmware leads to malfunctioning components. Always verify compatibility with your specific model to avoid bricking.
Power and Electrical Data Challenges
Unexpected electrical errors can occur post-flash, including telemetry loss. Monitoring battery and electrical data after updates is important to react quickly.
Best Practices for Firmware Backup
Before initiating a firmware update, it is imperative to recognize the critical role that firmware backups play in ensuring a seamless experience. Effective backup file organization is essential for quick retrieval during unexpected issues.
- Create dedicated folders for each drone and label them clearly.
- Utilize versioning by including timestamps in filenames, allowing easy tracking of changes.
It’s best to regularly update backups after any configuration changes, preserving essential settings like PID tuning and motor mixes.
Before restoration, verify backup completeness and compatibility with the new firmware version. Though the Betaflight Configurator’s “CLI dump” command offers a thorough backup, consider taking screenshots for additional confirmation. These practices foster a sense of community, knowing others share the same commitment to reliability.
Post-Flash Configuration and Testing
Ensuring ideal performance requires diligent post-flash configuration and testing of flight controllers and electronic speed controllers (ESCs). The initial reconnection begins with verifying the flight controller’s detection on the appropriate COM port. Following this, post flash adjustments must include calibrating the accelerometer for accurate orientation sensing.
Next, checking ESC settings is essential. Users should verify motor direction, startup power, and braking parameters to prevent motor damage. Additionally, sensor verification is important; monitoring gyro, magnetometer, and barometer readouts contributes to safe operations.
Finally, cautious test flights in secure environments enable identification of any unexpected behavior, ensuring that settings align with performance expectations. Engaging in this thorough process fosters a safe and enjoyable flying experience for all enthusiasts.
Ensuring Firmware Compatibility and Stability
Achieving seamless integration of flight controllers and electronic speed controllers (ESCs) hinges on the critical aspect of firmware compatibility and stability. Hardware verification is essential: verify the microcontroller, like STM32 F4 or F7 series, meets firmware requirements. Conduct firmware audits to confirm ESC selection aligns with the chosen firmware, such as BLHeli_S for specific chipsets. Compatibility matrices will help validate the correct match between ESC and flight controller protocols, promoting ideal telemetry integration. Regular stability assessments are crucial; always opt for the latest stable firmware versions, avoiding untested releases. Finally, maintain an organized record of your firmware configurations to facilitate quick recovery after flashing errors. This attention to detail fosters a reliable and enjoyable flying experience for all enthusiasts.
Frequently Asked Questions
What Tools Do I Need for Firmware Flashing?
To successfully flash firmware, one requires compatible flashing software tailored to the specific device and appropriate connection cables, such as USB to UART adapters. These tools guarantee smooth communication and reliable updates for enhanced performance.
Can I Flash My ESC Without a Flight Controller?
Yes, ESC programming can occur independently of a flight controller. Remote flashing allows firmware updates if ESC compatibility aligns with specific tools, ensuring enthusiasts achieve the best performance while feeling connected in their shared hobby.
How Do I Know if Firmware Is Compatible With My ESC?
To determine ESC firmware compatibility, conduct ESC compatibility checks using tools that identify hardware and installed firmware, ensuring alignment with flight controller features. This prevents issues when flashing, fostering a sense of community understanding and shared knowledge.
What Should I Do if Flashing Fails?
Frustrating failures necessitate focused failure recovery. Troubleshoot by checking connections, using alternative cables, or reinstalling drivers. Employ specialized tools for desaturation, ensuring stability and successful flashing during the intricate process of electronic adjustments and repairs.
How Often Should I Update My Firmware?
Firmware updates should occur when significant improvements or fixes are released, following best practices. Frequent updates can jeopardize firmware stability, so it’s wise to align updates with essential changes instead of adhering to a rigid schedule.


