As an Amazon Associate, we earn from qualifying purchases. Some links on this site are affiliate links at no extra cost to you. Our recommendations are based on thorough research and editorial judgment.

How To Set Up A Flybarless System
Setting up a flybarless system involves several key components and procedures. Begin with a flight controller, like the Spektrum FC6250HX, to regulate stability. Use digital servos for quick response and connect sensors for peak functionality. Properly mount the flybarless controller and route power leads separately to minimize interference. During programming, assign functions and set gyro gain appropriately. This setup enhances efficiency and control in flight. Discover more tips and techniques for optimizing performance!
Key Takeaways
- Securely mount the flybarless controller parallel to the rotor disc using double-sided tape for optimal positioning.
- Connect servos to the correct channels and ensure proper signal wire polarity for accurate responsiveness.
- Access programming mode to configure transmitter channels and set gyro gain around mid-range (e.g., 45%).
- Route power leads separately from signal wires to minimize interference and enhance stability.
- Regularly inspect and maintain battery health, charging them with smart chargers and storing them properly.
Understanding Flybarless Systems
You may be interested


As the aviation landscape evolves, understanding flybarless systems becomes increasingly important for helicopter enthusiasts and pilots. Flybarless (FBL) systems replace the traditional mechanical flybar with electronic stabilization using gyros and accelerometers. This innovation offers several flybarless benefits, including:
- Reduced Mechanical Complexity: Fewer fragile parts lead to lower crash damage costs.
- Weight Savings: A lighter rotor head improves efficiency and enhances flight performance.
- Digital Fine-Tuning: Pilots can adjust flight parameters like yaw and pitch through software, ensuring precise control.
FBL systems do not self-level but maintain the helicopter’s last commanded attitude, providing stability in challenging conditions. This precise response allows for direct control, making it a preferred choice for advanced maneuvers and 3D flying. Embracing this technology cultivates a sense of community among pilots. Additionally, the use of electronic stabilization contributes to improved overall performance and safety during flight.
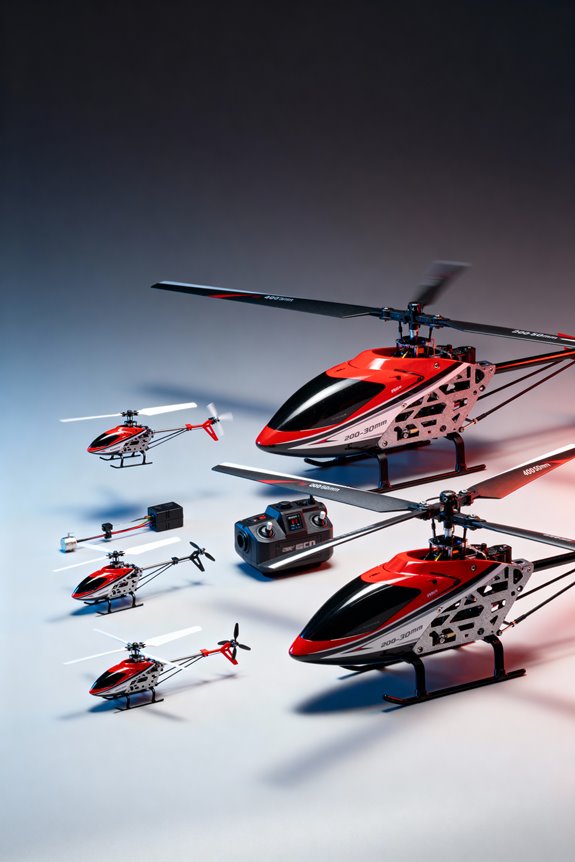
Hardware Components Required for Setup

Setting up a flybarless system involves a selection of key hardware components that guarantee peak performance and control.
Flight Controller Unit
This is the heart of the system, regulating stability and flight behaviors. Models like the Spektrum FC6250HX, operating at 4.8V to 8.4V, are popular for their features such as AS3X.
Servo Selection
Opt for digital servos for their quick response and accuracy. Some systems, like Spirit GT, support expansion beyond 8 servos, enhancing flexibility.
Power Requirements
Separating the power supply for the flybarless controller minimizes voltage drop. Reliable, thick gauge wiring is essential to manage the high current draw in larger helicopters, ensuring optimal performance during flight. Additionally, ensuring safety features like proper insulation and fuse protection can further enhance system reliability.
Recommended Products

【Highly Realistic All Metal Helicopter】The JCZK 300C PRO rc helicopter is a meticulously scaled helicopter with an ultra-realistic design. Featuring an openable cockpit door, detailed dashboard, foot pedals, and proportional flight components, it uses metal materials with oxidation and sandblasting finish for a premium, authentic appearance
Ultra-Realistic Alloy Design: 3-blade flybarless RC helicopter with openable cockpit, detailed dashboard and metal sandblasted finish, creating a true-scale, premium realistic RC helicopter model
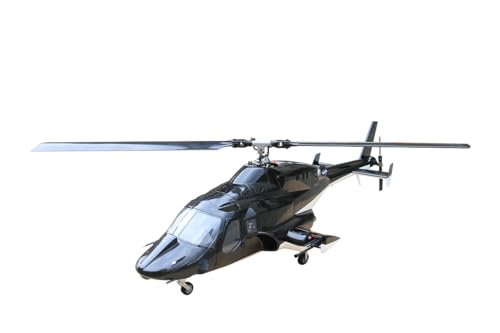
Type:Helicopter Painted fuselage
Installation and Wiring Procedures

Proper installation and wiring of a flybarless system are essential for achieving best performance and guaranteeing safety during flight. Start by securely mounting the flybarless controller, aligning it parallel to the rotor disc. Use double-sided tape, avoiding areas prone to vibration.
Wiring Best Practices
- Connect servos to the correct channels, confirming signal wire polarity.
- Attach sensors like RPM or tail gyros to designated ports.
- Confirm proper receiver connections and use manufacturer cables for reliable data transmission.
Installation Tips
- Route power leads separately from signal wires to reduce interference.
- Check all connections for secure soldering, minimizing the risk of short circuits.
Lastly, power up the system, verifying servo movements to prep for a safe flight. Additionally, ensuring the use of quality materials in your setup can enhance durability and performance, contributing to overall reliability during operation.
Programming and Initial Configuration

When configuring a flybarless system for ideal performance, understanding the programming procedures is crucial. To initiate setup, hold the designated button until the LED flashes, then release. This access allows users to scroll through various menu options using assigned sticks or buttons.
Parameter Updates:
- Assign transmitter channels for specific functions, making certain gyro gain is mid-range (e.g., 45%).
- Configure throttle endpoints to reflect full stick movements.
Configuration Strategies:
- Select a model size closest to your helicopter for automatic settings.
- Choose flight styles tailored to desired responses, utilizing setup switches for easy profile changes.
Remember to save your adjustments to avoid losing critical configuration settings, and double-check connections before finalizing setup to confirm everything functions properly. Additionally, ensure that your setup follows guidelines for safety features, as this can prevent overheating and enhance overall system reliability.
Recommended Products

ATT Self-leveling Mode-- This function utilizes a high-precision gyroscope/accelerometer and barometer working in tandem to automatically correct flight attitude in real-time, maintaining the helicopter in a fundamentally stable state. Unlike GPS mode, releasing the control sticks will not trigger automatic braking-instead, the helicopter returns to a level attitude autonomously. Compared to traditional gyro-assisted manual mode, it significantly reduces control pressure while offering more hands-on engagement than GPS mode, allowing you to focus more on the joy and creativity of flying!

✅ ATT Self-leveling Mode - This function utilizes a high-precision gyroscope/accelerometer and barometer working in tandem to automatically correct flight attitude in real-time, maintaining the helicopter in a fundamentally stable state. Unlike GPS mode, releasing the control sticks will not trigger automatic braking-instead, the helicopter returns to a level attitude autonomously. Compared to traditional gyro-assisted manual mode, it significantly reduces control pressure while offering more hands-on engagement than GPS mode, allowing you to focus more on the joy and creativity of flying!

【True-to-Life Design & Scale Realism】Based on the U.S. MD500 “Little Bird,” this 1:16 scale helicopter model features a highly detailed fuselage with realistic cockpit, opening cabin doors, seats, control sticks, and LED lights — offering a professional military-style appearance and immersive visual appeal
PID Tuning and Advanced Adjustments

Optimizing the performance of a flybarless system hinges on effective PID tuning and advanced adjustments. To start, users should employ incremental tuning techniques, beginning with lower P gains for stability, then gradually increasing for responsiveness. Individual tuning of pitch, roll, and yaw is crucial due to PID interaction effects; adjusting one can impact the others.
Besides basic PID components, advanced adjustments like tail drag compensation and cyclic pitch pre-compensation enhance overall performance. Agility settings provide tailored responsiveness for different flight modes. Additionally, understanding deep tissue percussion therapy can provide insights into optimizing muscle recovery and enhancing performance in related activities.
Testing and Final Setup Verification
Following effective PID tuning and advanced adjustments, the next phase involves thorough testing and final setup verification. This vital step guarantees that the helicopter is ready for flight and exhibits initial stability.
Physical and Mechanical Checks
- Position the helicopter on a soft, level surface.
- Confirm all control surfaces have full and unrestricted servo travel to prevent mechanical binding.
System Power-Up and Calibration Verification
– Power on the flybarless unit, confirming proper sensor calibration with a steady LED confirmation.
Radio Link Validation
– Bind the transmitter and receiver, conducting a full range check to verify receiver responsiveness.
Initial Hover Testing
– Perform low-altitude hovers to assess stability and control responsiveness. Carefully monitor test results for any signs of oscillation or drift, allowing for timely adjustments. Additionally, consider the importance of consistent use for optimal performance to ensure the helicopter maintains stability throughout its operations.
Common Issues and Troubleshooting
Maneuvering common issues and troubleshooting for a flybarless system can be essential for guaranteeing ideal helicopter performance.
Calibration Mistakes
Incorrect calibration may lead to sensor failures, causing sudden tilting or aggressive auto-correction. Always calibrate on a flat, non-metallic surface.
Mechanical Instability
Bent shafts or loose linkages can cause instability. Check tail belt tension to prevent tail rotor failures.
Binding Issues
Wrong binding protocols might interrupt control. Guarantee proper firmware and transmitter settings to maintain communication.
Power Interruptions
Aged batteries or loose wiring can compromise performance. Regularly inspect components for integrity and balance.
Tuning Challenges
Excessively high gyro gain can produce wobbles. Take the time to customize PID settings for stable flight.
Stay informed, and troubleshooting will become manageable, enhancing overall helicopter enjoyment.
Best Practices for Maintenance and Care
Ensuring ideal operation of a flybarless system goes hand-in-hand with proper maintenance and care. Implementing effective maintenance routines and cleaning schedules is essential for longevity.
Storage Conditions
- Maintain temperatures between 50–75°F (10–24°C) and keep humidity low (40–60%).
- Use padded cases for protection and remove batteries, storing them in fireproof containers.
Battery Management
- Charge with a smart or balance charger, avoiding deep discharges.
- Regularly inspect batteries for damage and disconnect after use.
Cleaning and Lubrication
- Clean components with soft brushes to avoid dirt build-up.
- Lubricate moving parts monthly with RC-grade lubricants.
Understanding the Role of Gyros and Accelerometers
Gyros and accelerometers play essential roles in flybarless systems, offering advancements that considerably enhance helicopter stability and control.
Gyros
- Function: Gyros detect rotational acceleration around the helicopter’s axes.
- Types: Mechanical rate gyros and modern MEMS gyros are commonly used.
- Calibration: Proper gyro calibration is vital for accurate stabilization.
Accelerometers
- Role: Accelerometers measure linear acceleration and help ascertain orientation.
- Alignment: Proper accelerometer alignment is necessary to minimize gravitational interference.
- Integration: Combined with gyros, they provide real-time corrections to pitch, roll, and yaw deviations.
Through effective gyro calibration and careful accelerometer alignment, users can achieve precise control, improving overall flight experience. This integration simplifies the flight dynamics, making advanced control accessible.
Advanced Features of Flybarless Systems
When exploring the advanced features of flybarless systems, one quickly realizes how these innovations enhance overall performance and pilot experience.
Algorithm Enhancements
Modern systems leverage firmware with cutting-edge algorithm enhancements. This improves flight control precision and stability, even in extreme 3D maneuvers.
Stabilization Techniques
Advanced stabilization techniques incorporate vibration filtering and orientation algorithms, allowing flexibility in helicopter mounting. Features like rescue and horizon modes offer automatic stabilization, boosting pilot safety and confidence.
Integration and Connectivity
These systems often integrate with receivers and ESCs in one unit, facilitating simpler installations. USB and wireless interfaces allow for real-time adjustments, ensuring tailored experiences without helicopter disassembly.
Collectively, these advancements contribute to a safer, more enjoyable flying experience—inviting pilots to feel connected and empowered.
Frequently Asked Questions
Can I Use a Flybarless System on a Fixed-Wing RC Aircraft?
Using a flybarless system on a fixed-wing RC aircraft is generally discouraged, as fixed-wing benefits demand specialized gyros. Flybarless advantages cater to helicopter dynamics, and mismatched systems hinder peak performance and stability.
What Is the Typical Lifespan of a Flybarless System?
The typical lifespan of a flybarless system ranges from 1 to 3 years, influenced by flybarless durability and system maintenance. Regular care can extend longevity, making it essential for enthusiasts invested in reliable performance.
How Do I Update the Firmware on My FBL Unit?
Updating the firmware on the FBL unit symbolizes care for one’s technological companion. This sacred system maintenance guarantees it thrives. Connect the device, launch the software, and follow prompts—nurturing stability and seamless flight.
Are There Compatibility Concerns Between RX and FBL Units?
RX compatibility issues greatly impact successful FBL setups. Ensuring brand-specific receivers align with FBL units fosters seamless operation, elevating enthusiasts’ experiences. Adhering to established FBL setup tips enhances compatibility and performance, promoting a cohesive flying community.
Can I Mix Different Servo Brands With My FBL System?
Mixing different servo brands can lead to compatibility challenges; variations in speed, torque, and PWM may compromise brand performance. Enthusiastic pilots share experiences, underscoring the importance of careful selection for harmonious flight in shared communities.