As an Amazon Associate, we earn from qualifying purchases. Some links on this site are affiliate links at no extra cost to you. Our recommendations are based on thorough research and editorial judgment.

How To Choose The Right FPV Camera
Choosing the right FPV camera hinges on several key factors. First, decide between CMOS and CCD sensors; CMOS offers better image processing and power efficiency. Consider resolution and frame rate—1080p at 60 fps provides a great balance. Latency matters too; aim for under 40ms for responsive controls. Don’t overlook low-light performance, especially for night flying. Finally, weigh your budget against features to find the best value. Understanding these aspects sets the stage for a wise choice.
Key Takeaways
- Select between CMOS for efficiency and dynamic range or CCD based on your specific requirements and preferences.
- Opt for a camera weight suitable for your drone’s agility, especially in racing scenarios where micro cameras are ideal.
- Ensure the camera provides a minimum resolution of 600 TVL and a desirable FOV of 120° to 155° for better situational awareness.
- Assess durability features like carbon fiber frames or sealed bodies, crucial for protecting against crashes and adverse weather conditions.
- Consider budget options for beginners, mid-range for enhanced quality, or high-end models for superior performance to find the best value for money.
Understanding FPV Camera Types
You may be interested


When selecting an FPV camera, understanding the various types and their features is essential for making an informed choice. FPV cameras primarily feature two Lens Types: CMOS and CCD. CMOS sensors are commonly preferred for their power efficiency and superior image processing.
Camera Mounting options play a significant role. Lightweight cameras are ideal for agility, especially in racing drones, while micro cameras serve tiny drones, focusing on minimal weight.
Key factors include resolution, with options like 1200TVL offering sharper images and better low-light performance, particularly advantageous for low-light flying. Additionally, consider the field of view (FOV), which ranges from 120° to 155°, affecting situational awareness. Choosing the right camera aligns closely with the user’s flying style and environment. Regular use of light therapy lamps can enhance mood and energy levels, which may also benefit drone pilots during long flying sessions.
Recommended Products
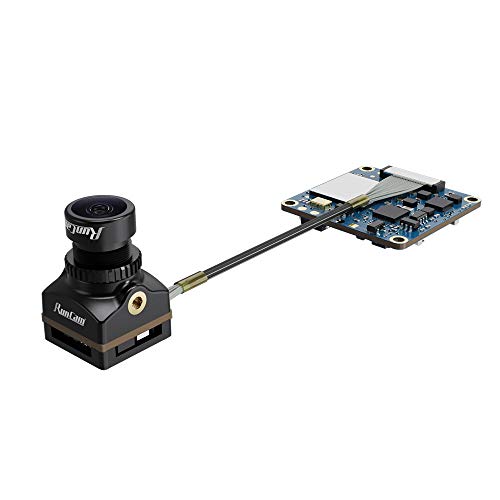
For any 5.8Ghz FPV Transmitters: Built-in super sensitiveness 5.8GHz 40ch receiver, you can get a real-time video return in very low time delay.

High-Resolution & WDR: Equipped with a 1/2" high-sensitivity sensor, the Farsight delivers up to 1500TVL resolution with Wide Dynamic Range, ensuring clear details in both bright and dark environments

【High-Performance FPV Camera】: The Spotter V2 Micro FPV AIO Camera is designed for fpv RC cars, RC boat,fpv drone,RC planes and other RC hobbies. With an integrated FOV170 Degree 700TVL camera, it delivers high-quality video for an immersive FPV experience.
Differences Between Analog and Digital FPV Cameras

The choice between analog and digital FPV cameras greatly impacts the flying experience, reflecting various trade-offs in performance and capability.
Video Quality
Analog cameras transmit raw signals, offering lower resolution and susceptible to signal degradation at distances. In contrast, digital systems provide high-resolution video quality with clearer feeds due to digital encoding, handling interference better. Additionally, effective relief for menstrual cramps can be achieved using high-quality materials, similar to how digital cameras enhance video clarity.
Latency
Analog systems boast low latency around 15ms, ideal for drone racing. However, digital systems can vary, especially in weak signals, impacting responsiveness.
Cost and Durability
Cost differences are significant; analog setups are often around $100, while digital can exceed $600. Additionally, analog cameras are smaller, lighter, and more durable, whereas digital systems may face durability concerns due to bulkier components and cables.
Understanding these differences helps pilots make informed choices to suit their needs.
Recommended Products
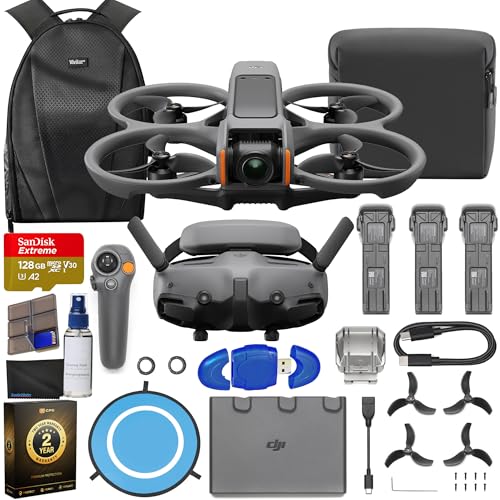
Bundle Includes: DJI Avata 2 Fly More Combo (3 Batteries), SanDisk 128GB Extreme microSD Memory Card, High USB Speed Memory Card Reader, Sling Bag, Drone Photography Backpack, RC Motion 3, RC Motion 3 Lanyard, Goggles 3, Goggles 3 Foam Padding Goggles 3 Extra Forehead Pad, Pair of Goggles 3 -2.0D Corrective Lenses, Two-Way Charging Hub, USB-C OTG Cable, 2 x Pair of Propellers, 8 x Propeller Screw, Screwdriver, Gimbal Protector, USB-C PD Cable, Bundle It Better Lens Cloth

Unlock Adrenaline-Pumping Immersive Flying - Prompt visual feedback through goggles as if you were right there in the cockpit, enjoying a breathtaking perspective, pure thrill and total freedom.

Enhanced Camera for Travel Shots - Air 3S's 1" CMOS primary camera delivers breathtaking shots with enriched detail in low-light scenarios like sunsets and nightscapes.
Key Specifications to Consider

Selecting the right FPV camera requires careful consideration of key specifications, as these factors directly influence performance and user experience.
Size and Weight
Camera sizes vary, with Micro (21mm) being popular for 3 to 5-inch frames, while Nano (14mm) is ideal for smaller drones to enhance agility.
Aspect Ratio Selection
Choosing between 4:3 and 16:9 is essential; 4:3 provides a better vertical field of view, particularly during sharp maneuvers. Ensuring compatibility with FPV goggles prevents footage distortion.
Sensor Technology
CMOS sensors dominate the market due to their enhanced dynamic range and efficiency. Opting for a quality sensor improves image performance, especially in low-light conditions. Additionally, battery life plays a crucial role in ensuring uninterrupted camera operation during flights.
Recommended Products

For any 5.8Ghz FPV Transmitters: Built-in super sensitiveness 5.8GHz 40ch receiver, you can get a real-time video return in very low time delay.
[Smallest 4K FPV&HD 4K Camera]: Runcam Split 4 is an HD camera designed to be mounted in tiny whoops or “toothpick” micro drones,like the BetaFPV Nano,make it a smallest 4K FPV drone.

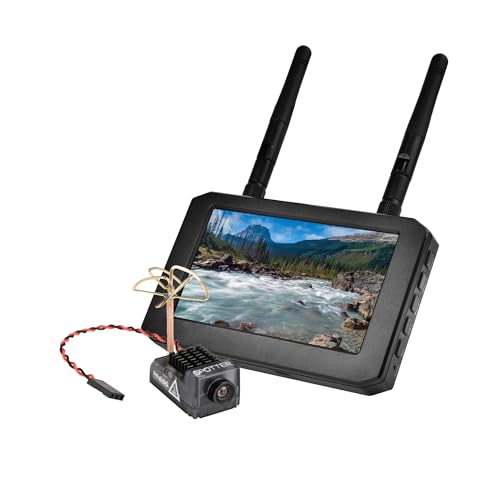
This FPV monitor is 800*480 high-definition screen, 16:9 display ratio, bring the best image display effect.
Importance of Resolution and Frame Rate

Choosing the appropriate resolution and frame rate is vital for maximizing the performance of an FPV camera. Higher resolution increases image clarity, aiding in obstacle identification, while frame rate balance determines the smoothness of video playback.
- Resolution Trade-offs: A higher resolution, like 4K, may capture intricate details but can compromise frame rate. Lower resolutions combined with higher frame rates, such as 1080p at 60 fps, enhance fluidity, which is fundamental for fast maneuvers.
- Frame Rate Importance: Smoother video at higher frame rates, like NTSC’s 30 fps, allows for quick reactions in racing. A careful examination of these elements guarantees pilots can navigate effectively, making informed choices that align with their flying styles. Balancing these factors fosters a fulfilling FPV experience. Additionally, understanding the safety features of the equipment can enhance the overall flying experience by ensuring reliable performance under various conditions.
Evaluating Latency in FPV Cameras

Evaluating latency is essential for seamless flying experiences.
- Latency Measurement: Utilize methods like LED and light sensor setups for precise timing.
- Sensor Readout: Understand that internal processing speeds greatly impact latency.
- Testing Methods: Oscilloscope measurements provide reliable readings, though access may be limited.
- Video Encoding: Consider that encoding and transmission layers can add delays.
- Display Processing: Refresh rates affect accuracy; for instance, 60Hz screens can introduce noticeable lag. Additionally, understanding advanced LED technology can help pilots appreciate how camera features impact latency and overall performance.
The Role of Sensor Size in Image Quality
Sensor Performance and Image Clarity
- Larger Sensors: Typically, larger sensors gather more light, enhancing low-light performance and reducing noise. For example, a 1/1.8″ sensor considerably outperforms a 1/3″ sensor in darker conditions.
- Dynamic Range: Bigger sensors offer wider dynamic range, capturing more detail in both bright and dark areas. This advantage aids pilots in maneuvering around obstacles effectively.
- Depth of Field: Larger sensors can create a selective focus, improving the clarity of critical details.
Furthermore, red light therapy devices utilize various wavelengths to enhance healing and recovery, which parallels the importance of sensor quality in optimizing performance.
Ultimately, sensor size impacts image clarity, bringing together details that enhance the pilot’s experience and connection to the FPV community.
Choosing the Right Field of View
What considerations should one weigh when selecting the ideal field of view (FOV) for FPV flying?
- Field Selection: It’s essential to match FOV preferences with flying style. Racing pilots often choose wider FOV (150°+) for better situational awareness, while freestyle flyers may prefer narrower FOV to reduce distortion effects.
- Distortion Effects: A wider FOV can introduce fish-eye distortion, making edge objects appear curved. This can impair spatial awareness, impacting performance.
- Aspect Ratio: The choice between 4:3 and 16:9 aspects also matters. The former enhances vertical FOV for better judgment; the latter offers a wider cinematic experience.
To optimize outcomes, experimentation with focal lengths, typically between 2.5mm to 2.8mm, allows pilots to strike a balance between detail and environment visibility.
Durability Features for Long-Term Use
When selecting an FPV camera for long-term use, durability features are important for ensuring reliable performance over time.
Crash Resistance
Choosing a camera with a carbon fiber frame enhances durability, offering superior crash resistance compared to plastic options. Metal or aluminum casings also protect the camera from impacts, while enclosed designs safeguard internal electronics.
Environmental Protection
Opt for cameras with sealed bodies to resist water and dust, essential for outdoor enthusiasts. Additionally, lenses made from glass or metal resist scratches, maintaining image quality.
Thermal Management
Effective heat dissipation is significant; cameras with metal chassis help regulate temperature during prolonged use. By prioritizing these features, users can enjoy a camera that withstands the challenges of FPV flying, ensuring lasting adventures.
Brand Ecosystems and Compatibility
Selecting the right FPV camera involves understanding the nuances of brand ecosystems and compatibility. Pilots face compatibility challenges when choosing between closed ecosystems like DJI, which fully lock users into their products, and more open ecosystems such as Walksnail and HDZero.
Benefits of Ecosystem Compatibility****
- Seamless Integration: Closed systems offer standardized components for easier use.
- Flexibility: Open systems allow customization, mixing brands, and future upgrades.
Partnerships Enhance Flexibility
Brands like RunCam team up with others to optimize performance across digital platforms. This collaboration reduces barriers, enabling users to experiment with various technologies while maintaining compatibility.
Understanding these dynamics can empower pilots to make informed decisions tailored to their needs and aspirations within the FPV community.
Selecting the Right Camera for Racing
How can a pilot guarantee they are choosing the best camera for racing? Selecting the right camera involves several key factors:
Size and Weight: Micro size cameras (28mm) offer an ideal balance, enhancing agility. For smaller frames, nano options (14mm) maintain lightweight builds, vital for battery optimization and race performance.
Sensor Quality: CCD sensors provide superior image clarity and lower latency, critical for quick reactions. Aim for a resolution of 800-1000 TVL, assuring real-time responsiveness.
Aspect Ratio: Opt for a 4:3 aspect ratio to maximize vertical FOV, vital for tracking obstacles. Confirm compatibility with goggles to avoid image distortion.
Durability: A protective casing helps withstand crashes, while custom mounts enhance stability, reducing vibrations during intense races. These attributes contribute considerably to overall frame weight and performance.
Recommended Products

Open-Source Foundation: The WiFiLink FPV Camera system is built on OpenIPC, fostering a community-driven approach to development and customization. This allows users to tailor their FPV experience to their specific needs.

For any 5.8Ghz FPV Transmitters: Built-in super sensitiveness 5.8GHz 40ch receiver, you can get a real-time video return in very low time delay.

【Starlight Night vision FPV Camera】Foxeer Micro Cat 4 is a 1/3" CMOS Sensor night flight fpv camera
Ideal Cameras for Cinematic Flying and Freestyle
Ensuring low latency HD video feeds is essential for precise control, allowing for dynamic flight and smooth shifts. With durable designs, these cameras withstand the rigors of freestyle maneuvers, fostering community belonging among FPV enthusiasts.
Recommended Products
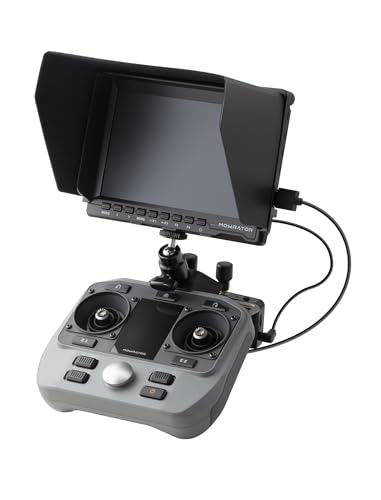
Immersive 1080P HD FPV Display: Experience a crystal-clear 1080P real-time view with ultra-low latency transmission, delivering smooth, distortion-free visuals while mowing. The high-definition screen enhances detail and depth, helping you navigate edges, obstacles, and complex terrain with greater precision and confidence.

Experience the Thrill of Flying: Enjoy total immersion and intuitive control with DJI Avata. When you combine Avata with the goggles and motion controller, flight becomes accessible to all..Shutter Speed : Video: 1/8000-1/50 s, Photo: 1/8000-1/50 s. Video Format : MP4. Diagonal Distance : 120 mm.

Experience the Thrill of Flying - Enjoy total immersion and intuitive control with DJI Avata. When you combine Avata with the goggles and motion controller, flight becomes accessible to all.
Low-Light Performance and Night Flying Options
While high-quality cameras are essential for cinematic flying and freestyle maneuvers, low-light performance becomes a significant factor when flying after sunset or in dimly lit environments. Choosing cameras like the Foxeer Cat Super Starlight, known for its 0.0001 lux sensitivity, showcases advanced low light techniques.
- Sensor Size Matters: Larger sensors capture more light, enhancing clarity.
- Color vs. Black & White: B&W cameras excel in darkness, while color cameras maintain vividness but may introduce noise.
- ISO Settings: Balancing ISO, like the DJI O4 Pro’s ISO 3200, can help mitigate noise while optimizing camera sensitivity.
Assessing these factors helps pilots enjoy enthralling night flights without compromising on image quality, ensuring a thrilling experience in the dark sky.
Cost Considerations and Value for Money
When considering the purchase of an FPV camera, cost and value for money play significant roles in the decision-making process. Buyers often face budget comparisons among various tiers, ranging from basic analog models under $20 to advanced digital systems exceeding $300.
Key considerations include:
- Budget Options: Cameras priced between $20 and $40 offer decent quality, making them ideal for beginners.
- Mid-Range Choices: Priced at $40 to $70, these offer enhanced features and durability.
- High-End Investments: Cameras over $140, while costly, often provide superior image quality and longevity, justifying their price for frequent users.
Ultimately, selecting a camera that balances features and price can greatly enhance overall value for an FPV enthusiast, ensuring satisfaction and longevity.
Performance Metrics That Matter
Performance metrics play an essential role in determining the suitability of an FPV camera for pilots of all skill levels. Key aspects to take into account include:
- Latency: Low latency (under 40ms) is critical for fast-paced flying, enhancing pilot control and reaction time. Analog cameras typically offer better performance, with models like the Runcam Hybrid Split V2 achieving around 12ms.
- Image Sensor Quality: CMOS sensors are preferred for lower latency, while CCD sensors excel in image quality. A resolution of 600 TVL or higher guarantees a clearer video feed.
- Wide Dynamic Range (WDR): Advanced WDR avoids overexposure and underexposure of contrasting light conditions, ensuring clarity in various camera placements.
Understanding these metrics helps pilots make informed choices for the best flying experiences.
Making the Right Choice Based on Use Case
Choosing the right FPV camera requires careful consideration of the intended use case, as different scenarios demand varying camera features.
Camera Size and Weight
- Mini and Micro cameras are ideal for lightweight drones, offering agility with less drag.
- Standard cameras provide better image sensors but can add weight, excellent for cinematic use.
Low-Light Performance
– Cameras like the Walksnail Avatar HD Pro shine in low-light conditions, ensuring visibility during night flights.
Digital vs. Analog
– Digital systems, while slightly heavier, deliver superior image quality and features like onboard recording and image stabilization, perfect for content creators.
Durability Considerations
– Cameras with crash-resistant frames are essential for beginners, ensuring longevity even after those rough landings.
Ultimately, matching the camera’s specifications with the intended purpose enhances the FPV experience.
Frequently Asked Questions
How Do I Mount an FPV Camera on My Drone?
Mounting an FPV camera requires precise techniques; secure it firmly to guarantee camera stability. Position the mount forward with a slight downward tilt to enhance perspective, creating an exhilarating visual experience that draws every pilot closer to the skies.
Can I Upgrade My FPV Camera Later?
Upgrading an FPV camera is feasible if camera compatibility and installation considerations align with existing gear. Enthusiasts can enhance their experience by ensuring technical skills and the right parts are utilized for a successful upgrade.
What Accessories Do I Need for My FPV Camera?
Like a well-equipped adventurer, one needs various accessories for an FPV camera, including different lens types for diverse conditions, suitable cable lengths for connectivity, and protective gear to foster a sense of belonging in the hobbyist community.
How Do Different Camera Sizes Impact Drone Flight?
Camera sizes greatly influence drone flight, as larger cameras increase weight and can compromise flight stability. Lighter options enhance maneuverability and responsiveness, allowing enthusiasts to enjoy a more connected and immersive flying experience within their community.
Are There Any Common Mistakes to Avoid When Choosing an FPV Camera?
A staggering 70% of drone pilots encounter issues related to camera selection. Common mistakes include overlooking camera resolution and lens type, which affect image quality and performance during flight, ultimately diminishing the enjoyment of the collective experience.